.svg)


New look, same great product! HelloSign is now Dropbox Sign.
Dropbox sign has two options for signing: embedded signing and non-embedded signing. Dropbox Sign embedded signing allows users to legally sign documents directly on your website or mobile application rather than being redirected to a third-party site. In contrast, Dropbox Sign non-embedded signing directs users to Dropbox Sign's platform to complete the signing process, taking them outside of your application. In this article, we'll be focusing on Dropbox Sign embedded signing which works by providing a comprehensive API alongside a client-side library that adds the embedded signing experience to your site via an iFrame.
For example, if you're trying to onboard a cohort of new employees, Dropbox Sign embedded signing makes this process easy. New hires can easily access and sign essential documents, such as employee contracts, directly through your company's onboarding portal. This approach eliminates physical paperwork and ensures that all the necessary forms are completed accurately and securely.
In this article, you'll learn how to leverage Dropbox Sign to integrate the embedded signing experience into a Python application where you can upload documents that need to be signed. You'll also see how the signatories can access and sign these documents through the same site.
Implementing Dropbox Sign Embedded Signing in Python
To follow along with this guide, make sure you have the following:
- A Dropbox Sign account
- A Python 3 environment set up on your local machine
- The Git CLI installed on your local machine
- A code editor, such as Visual Studio Code, and a web browser, such as Google Chrome
Once you have all these prerequisites, it's time to generate an API key and create an API app on the Dropbox Sign dashboard.
Generating an API key and creating an API app
On the Dropbox Sign dashboard, you need to generate an API key and a client ID that will enable communication between your application and the Dropbox Sign API.
To obtain the credentials, log into your Dropbox Sign account, navigate to the Settings page, and select the API tab and then the Generate key:
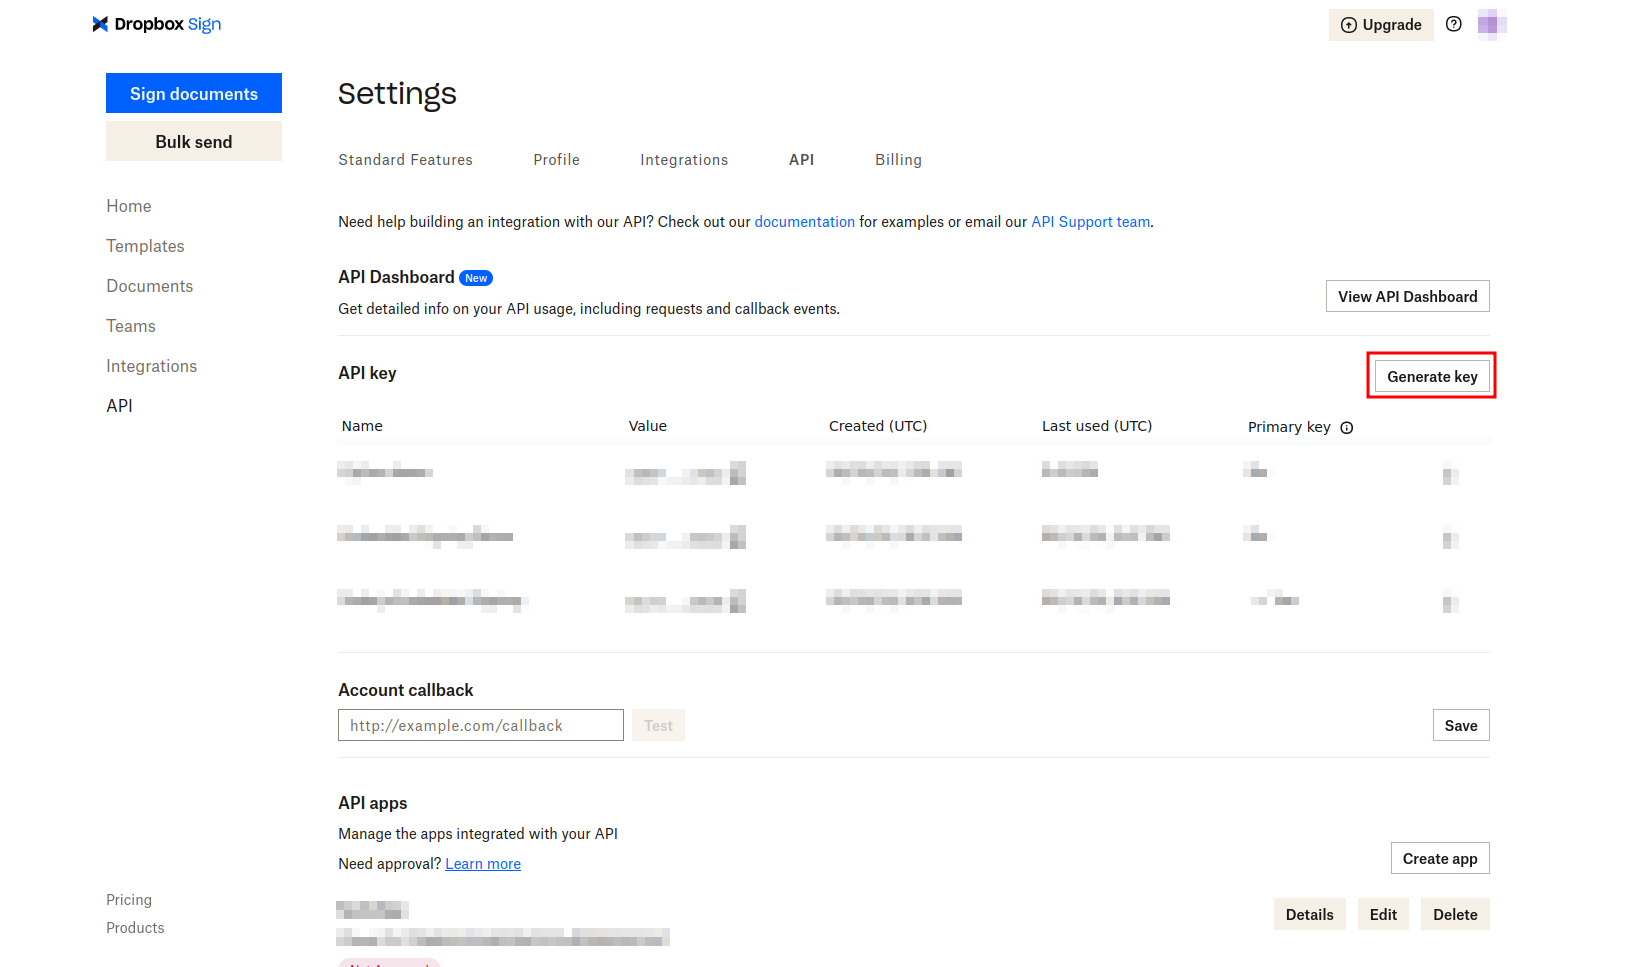
On the New key details modal, input "Python Embedded Signing" as the key's name and click Generate key. Take note of the key value, which you'll need later.
On the same page, click the Create app button to create a new API app and generate a client ID:
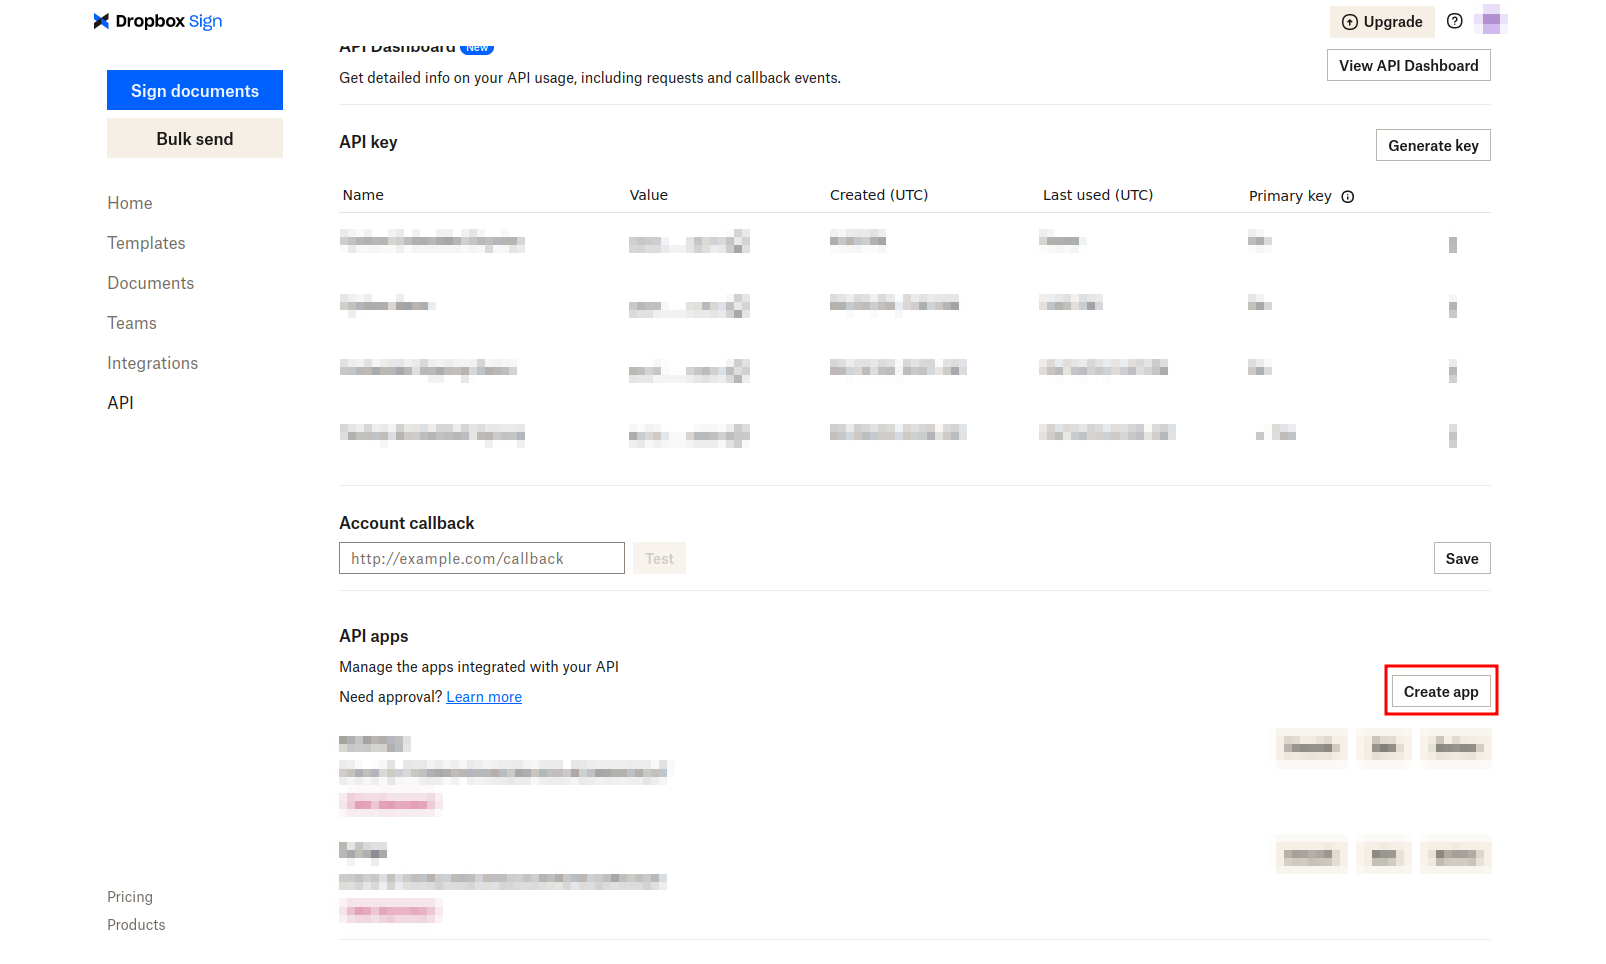
On the Create a new API app page, provide the application name (*eg* "PythonSign") and set the domain (*eg* example.com). This information is necessary for the production environment only and does not affect your local development in any way. Once you've provided this information, scroll down the page and click CREATE APPLICATION:

This creates the API application and generates a client ID. Again, take note of the API app value as you'll need it later.
Preparing the server
To make it easy for you to follow along and focus on integrating the embedded signing experience, a starter template has been created in Flask. This template contains all the authentication logic implemented using Flask-Login, the model definitions, and the necessary frontend code.
For simplicity, this project uses a SQLite database.
To clone the starter template to your local machine, execute the following command:
Navigate into the project folder, set up a virtual environment, activate it, and install all the necessary dependencies using the following commands:
Next, execute this command to copy the contents of the .env.example file into a new file named .env:
This new .env file holds all the environment variables. In it, replace the placeholder values for the DS_API_KEY and DS_CLIENT_ID with the API key and client ID values you obtained in the previous section. For SECRET_KEY, you can use any value.
You can find all the model definitions in the app/models file. The User model represents a user of the application, the SignatureRequest model represents a request for signatures on a document, and the Signatory model represents a signatory for the signature request. In the SignatureRequest model, the reference_id field stores the value of the document identifier in the Dropbox Sign servers. In the Signatory model, the ds_signature_id field stores the ID associated with the signatory on Dropbox Sign servers.
To run the application, set the FLASK_APP and FLASK_DEBUG environment variables by executing the following commands in your terminal:
Then, run the Flask server:
This creates a SQLite database with all the defined tables in the `instance` folder.
Navigate to http://localhost:5000 on your browser, and you'll be prompted to create an account and log into the application. After successful authentication, you are redirected to the dashboard page. Later on, after implementing the embedded signing experience, the dashboard will display all the embedded signature requests. You'll also be able to create signature requests, view their details, and sign the documents.
Integrating Dropbox Sign API into the application
To integrate the embedded signing experience, there are a couple of steps you need to complete:
1. Create an embedded signature request
2. Generate a Sign URL for the signers
3. Complete the signature request by signing the document
Initially, you need to install the Dropbox Sign Python SDK. Make sure that the virtual environment is still activated and then execute the following command:
Once the Dropbox Sign Python SDK is installed, you can create an embedded signature request.
Creating an Embedded Signature request
In this tutorial, you'll create the embedded signature request after a user submits the form defined in the app/templates/signatureRequests/create.html file. This form requires a user to provide the title and description of the signature request, the document to be signed, and the details of the signers.
To implement the functionality required to allow the user to create an embedded signature request, open the app/signature_requests.py file and replace the create method with the following code:
This code extracts data from the request body, including the title, description, and lists of signatory names, emails, and positions. It then saves the uploaded document to the specified upload folder (uploads, defined in the __init__.py file) with a unique file name generated using timestamps and UUIDs to prevent naming conflicts. The signature request details and the uploaded document's file name are then saved to the database using SQLAlchemy. For each signatory, a new Signatory object is created and added to the database.
After committing these changes to the database, the code proceeds to initiate an embedded signature request using the create_embedded_signature_request function (you'll implement this later), which interfaces with the Dropbox Sign API. The response from this function is used to update the signature request reference ID and link each signatory's unique signature ID (ds_signature_id).
Next, you need to implement the create_embedded_signature_request function. Open the app/utils.py file and add the following import statement to the file:
Then, create a configuration instance to be used in subsequent API calls by adding the following code just below the import statements:
Replace the create_embedded_signature_request function with the following code:
This code configures an ApiClient instance using the configuration object you set up in the previous step. Within the API client context, it initializes a SignatureRequestApi object to manage signature requests. It then defines signing options (signing_options), such as drawing, typing, uploading, and phone-signing capabilities, with a default type set to draw. It constructs a list of signers (signers_list) using a list comprehension, iterating through a list of signatory data to create SubSignatureRequestSigner objects containing email addresses, names, and signing orders. The signing order ensures that the signatory with order 1 cannot sign the document before the signatory with order 0.
The data needed for the embedded signature request is encapsulated in [SignatureRequestCreateEmbeddedRequest], including client ID, title, description, signers list, carbon copy email addresses, uploaded files, signing options, and test mode enabled. Finally, it attempts to create the embedded signature request using the signature_request_create_embedded method, handling any potential ApiException errors that may occur during the API call.
Generating a Sign URL for signers
Now that you've created an embedded signature request, it's time to implement the functionality that enables the signatories to sign the documents. The signatories can sign the document from the signature request details page defined in the app/templates/signatureRequests/details.html file.
Before displaying the signature request details, you need to generate a Sign URL of the current user listed as a signatory in the database for the specified document. Open the app/signature_requests.py file and replace the view function with the following code:
This code retrieves a specific signature request from the database using the request_id extracted from the URL. If the signature request does not exist, it aborts with a 404 error. It then checks if the current user is authorized to view the request. If the user is neither the initiator nor a signatory, it aborts with a 403 error. If the current user is a signatory, it generates a signing URL for the user by calling the generate_sign_url function with the signatory's signature ID. You'll implement this function in the next step. Finally, it renders the signatureRequests/details.html template, passing the signature request details and the signing URL to the template.
Next, open the app/utils.py file and replace the generate_sign_url function with the following code:
This code creates an ApiClient instance with the configuration you defined in the previous section and initializes an EmbeddedApi object to manage embedded signing operations. Within this context, it attempts to retrieve an embedded signing URL using the embedded_sign_url method, passing in the signatory's signature_id. If an ApiException occurs during the API call, it catches the exception and prints an error message.
Completing the signature request by signing the document
At this point, you've implemented the functionality to create a signature request and generated a Sign URL for the signatories. Now, you need to work on the user interface to allow the signatories to sign the document. You do this by modifying the signature request details page.
Open the app/templates/signatureRequests/details.html file and add the following code just before the block end tag ({% endblock %}):
This code loads the Dropbox Sign client-side library]by linking to the CDN and defines a function, signDoc, that uses this library to open a signing window. When the signDoc function is called, it leverages a HelloSign client instance to open a signing URL (retrieved from a Jinja template variable sign_url) in an iFrame. It passes configuration options (such as the client ID), skips domain verification, and enables test mode.
> Remember to replace `<YOUR-CLIENT-ID>` with the API app client ID you obtained earlier.
With this, the signatories can now sign the documents. The client-side library emits various events that you can listen to, and then you can take the appropriate action. For example, you can listen when a signatory signs a document and then update their status in the database from pending to completed.
Testing the Embedded Signing experience
Congratulations! You've completed the Dropbox Sign API integration. But before you can test the application, you need to make a few more updates.
When a user opens the dashboard, you need to display all signature requests where they are either the initiator or the signatory. To do this, open the app/signature_requests.py and replace the index method with the following code:
This code retrieves all signature requests from the database where the current user is either the initiator or the signatory. It uses a query to filter SignatureRequest records, checking if the initiator_id matches the current user's ID or if any of the associated signatories have an email matching the current user's email. The filtered results are stored in the all_requests variable, which is then passed to the index.html template for rendering.
Next, on the signature request details page, you need to display the document that is being signed. Currently, the frontend includes the logic to display the file, but the backend cannot serve the document. To do this, open the app/signature_requests.py file and replace the uploaded_file function with the following code:
This code determines the application's base directory. It then constructs the full path to the file by combining this base directory with the upload folder specified in the application's configuration. If the file does not exist at the constructed path, a 404 error is returned. If the file does exist, it's sent to the browser using the send_from_directory function.
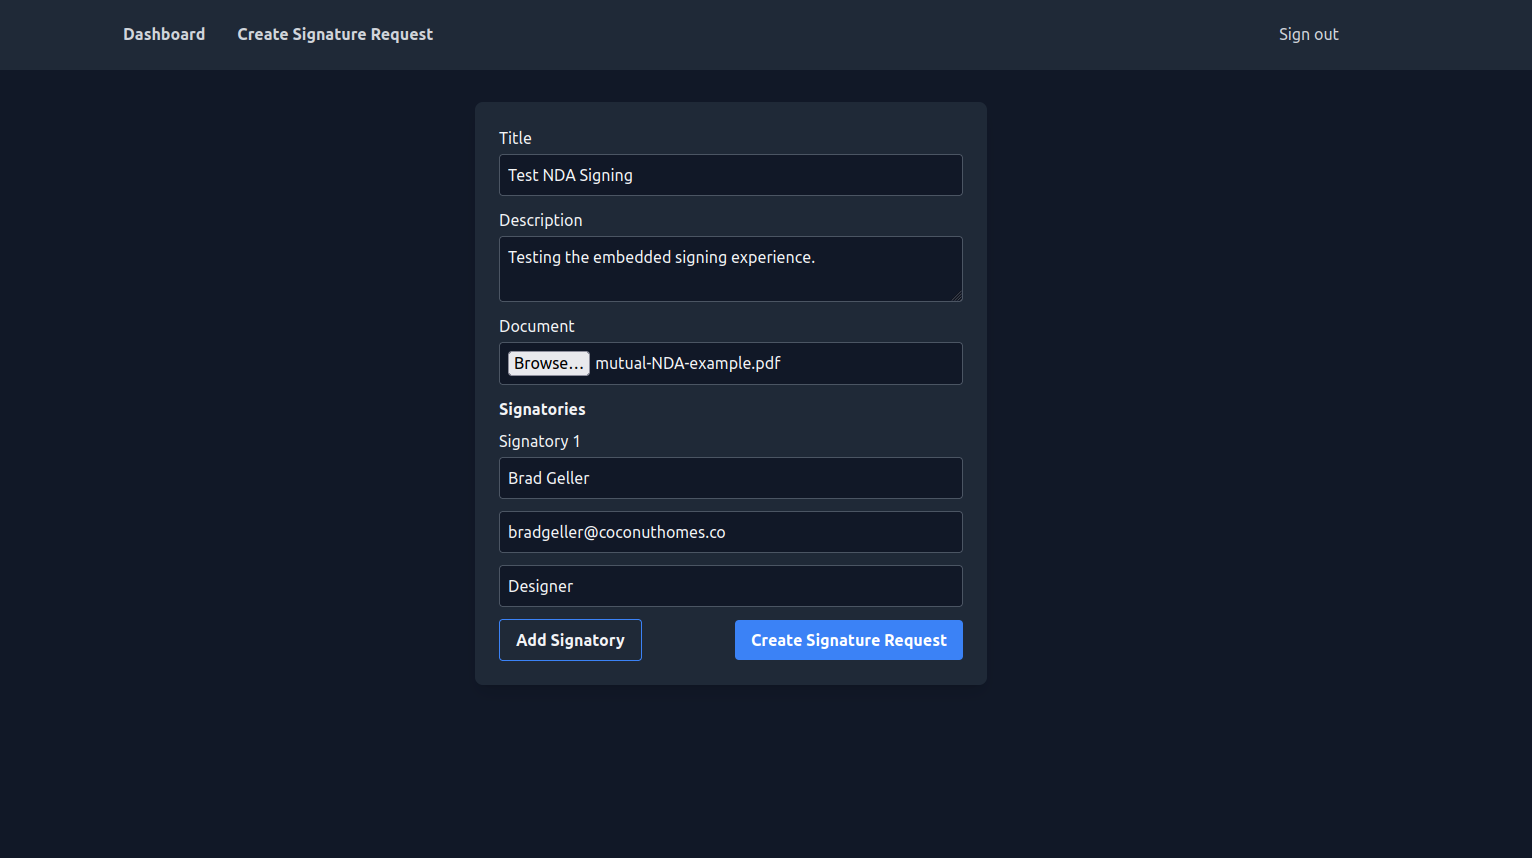
Now, it's time to test the application. Make sure the server is running by executing the command flask run in the terminal. Then navigate to http://localhost:5000/create. Fill out all the details required in the form and click Create Signature Request:
Once the signature request is created, you are redirected to the dashboard, where it's displayed under the Sent Requests tab. Make sure you've signed in with the first signatory's email address and you'll see the signature request under the Received Requests tab.
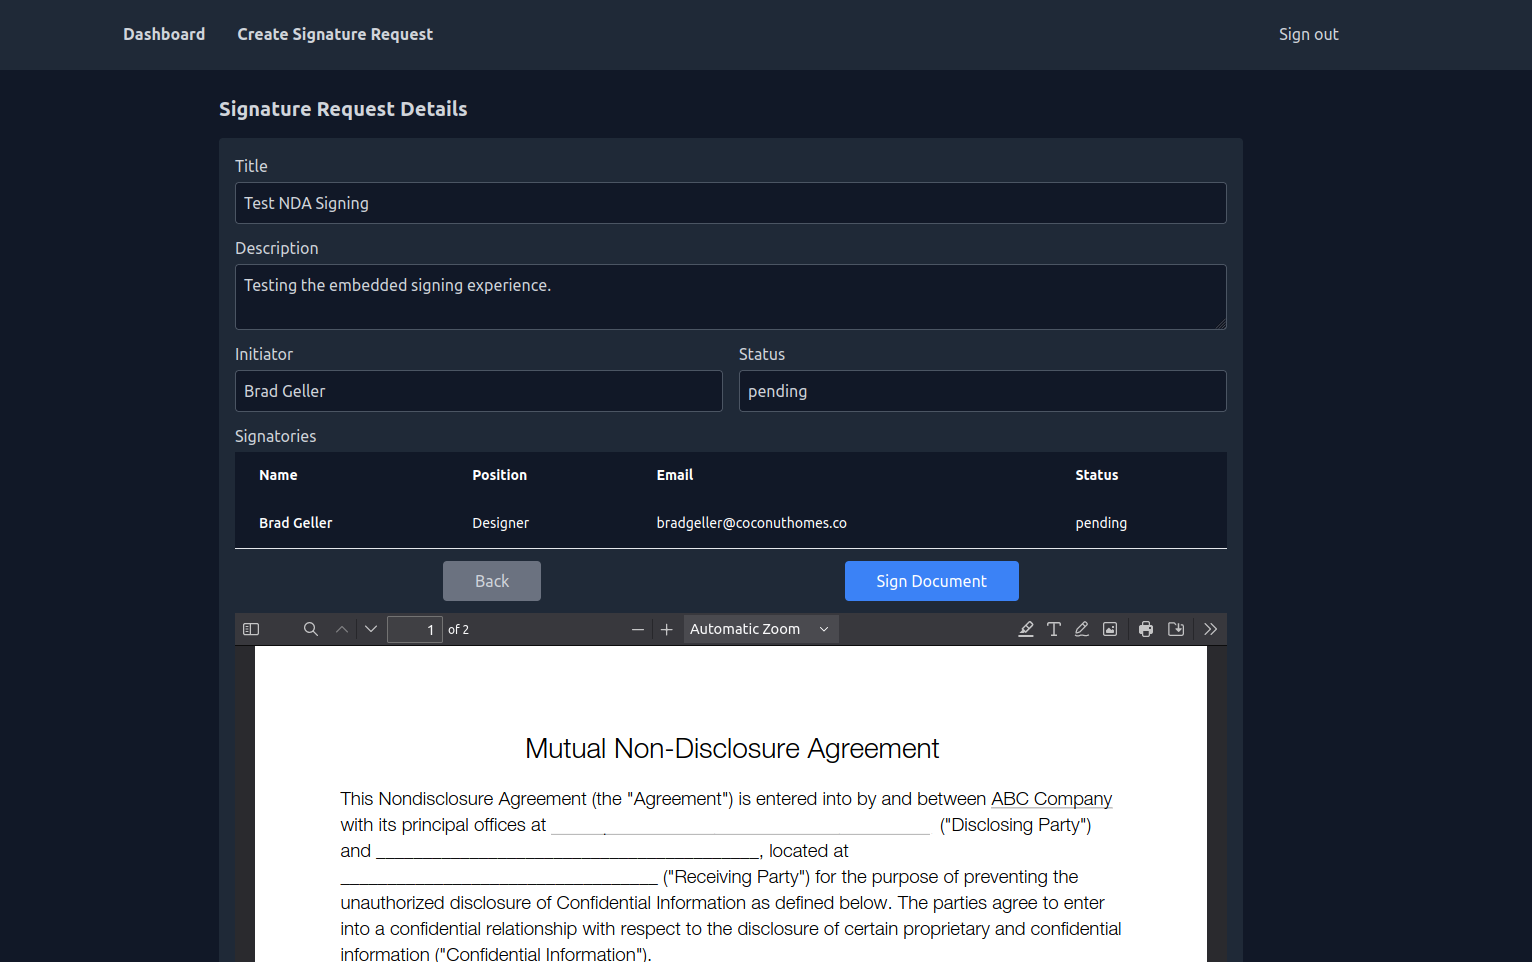
Click the View action on the signature request to open the details page. You should see the details of the signature request as well as a button to start the signing process:
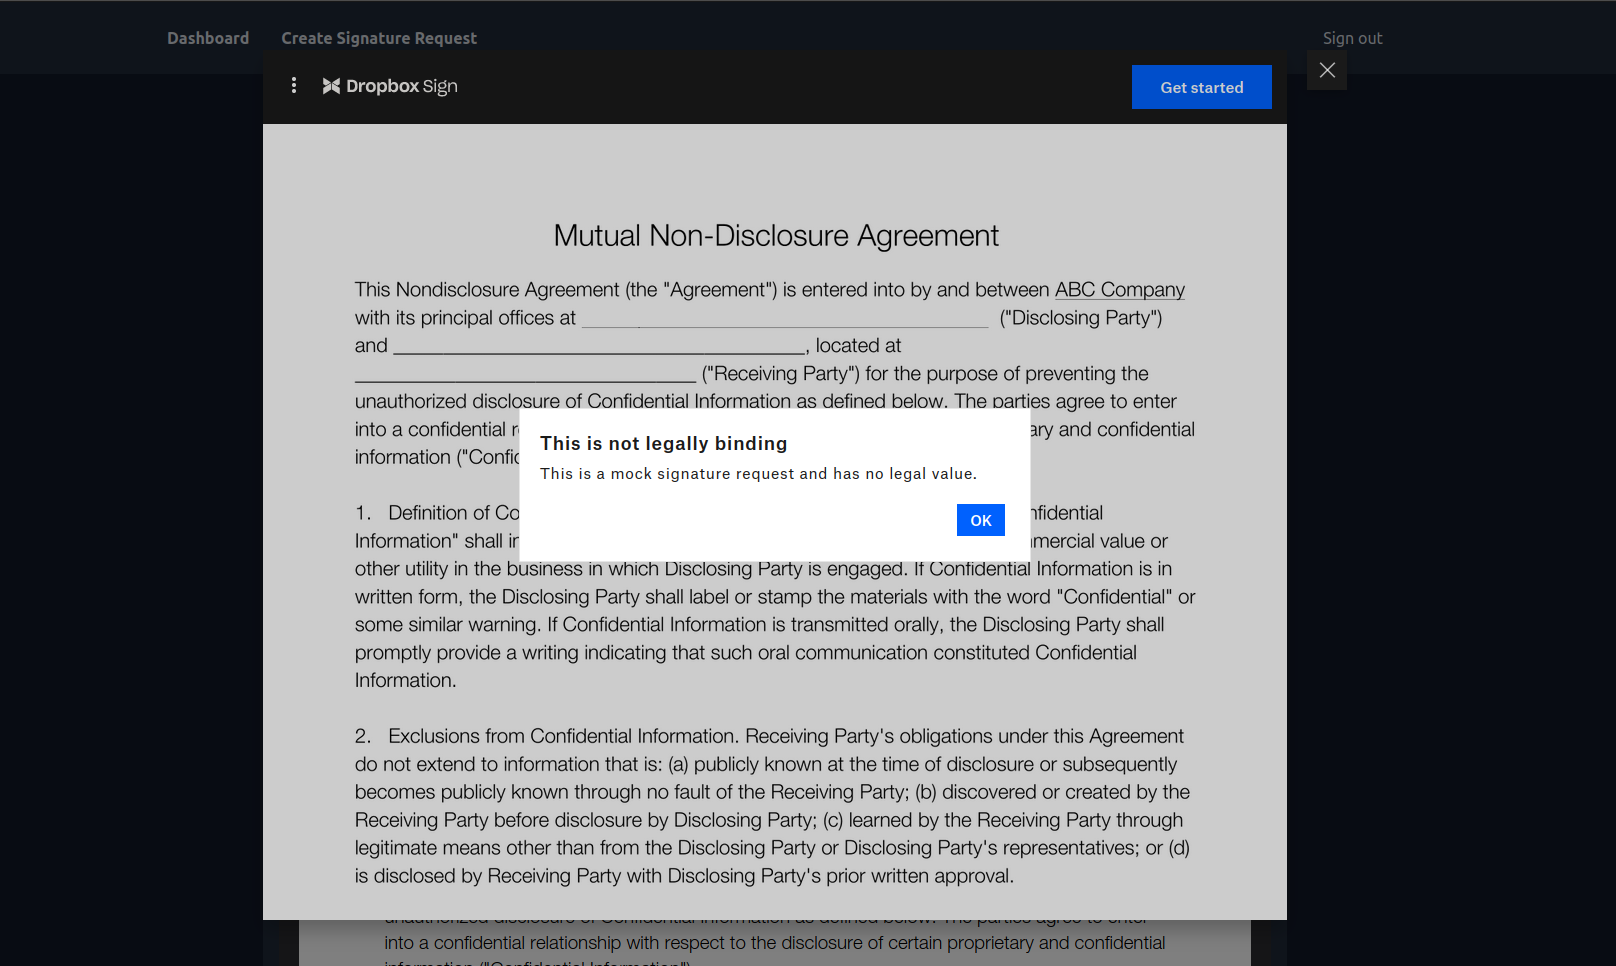
Click the Sign Document button to open the signing interface. An alert is displayed to inform you that this signature is not legally binding. This happens in the development environment (remember, you set the signature request in test_mode) only since your API client app has not yet been approved by Dropbox Sign:
Dismiss the alert, scroll down to the bottom of the document, and sign it:
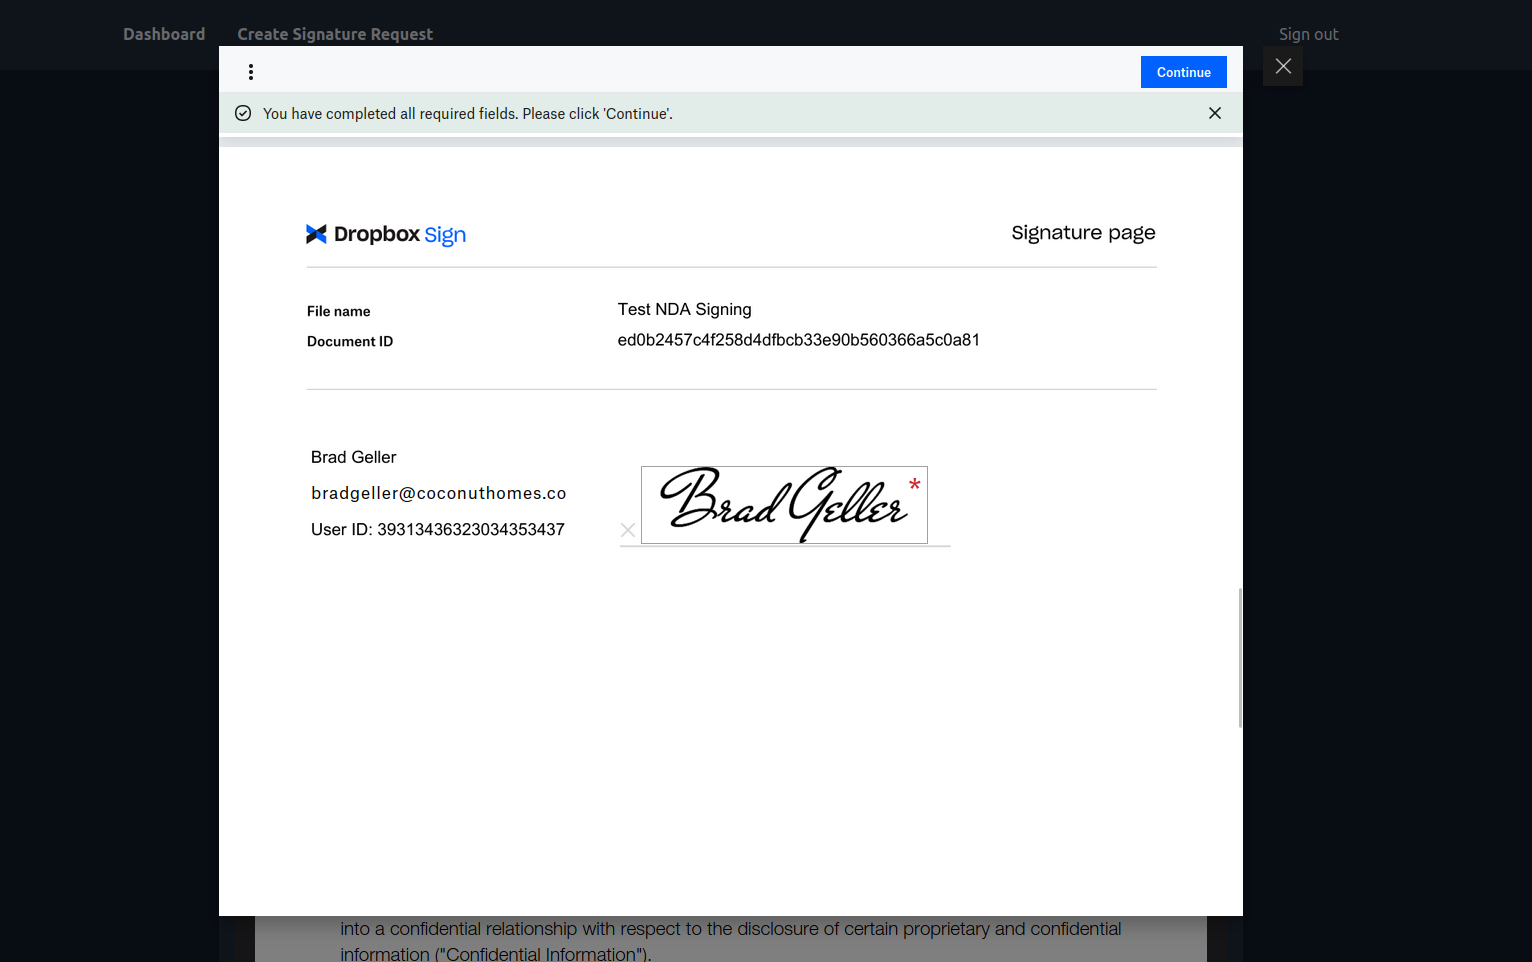
This confirms that the integration is working as expected.
For reference purposes, the full code for this application is available on GitHub.
Making the solution production-ready
At this point, the embedded signing experience works as expected in the development environment, but isn't optimized for production. Before you can push your application to the production environment, consider the following:
- Ensure the domain name you provide during API app creation is correct as embedded flows work only on the specified domain and its subdomains. Providing the top-level domain makes the embedded signing experience available on your subdomains as well.
- Get your API app approved. When signing the document, there is an alert informing the user that the signature they provide is not legally binding. To avoid this in production, ensure your app is approved to comply with eSignature regulatory policies.
- Listen to the client-side library events or the webhook events sent to your callback URLs and perform the necessary actions. For example, once a document is signed, you can update the status in the database.
Conclusion
In this guide, you learned how to use Dropbox Sign to implement an embedded signing experience into your Python application. You also explored steps to make sure that your application is production-ready.
Dropbox Sign offers a seamless and secure way to handle eSignatures. It simplifies the document-signing process, enhances document workflows, and ensures compliance with industry standards. Try Dropbox Sign today!
Stay in the loop
Thank you!
Thank you for subscribing!


